Wednesday, August 26, 2015

Chocolate Cosmos & Herbal Blends


So, after looking for 3 years for chocolate cosmos seeds I finally found some last winter. I ordered 3 packages. Planted them this Spring, protected them from the rabbits, all excited and waiting to dye with them.


When they finally bloomed I got this, regular pink  and white cosmos. I could have bought at our local grocery store for half price and no shipping costs.


You know the saying when you get lemons make lemonade. So I wrapped some up in premordanted wool fabric, steamed it for a good hour. Then left it to set for a few days.


After washing the fabric this is the result, very cute yellow, orange and green patterns.


Then green is where I sprinkled on extra pink flower petals.


This months herb society meeting was all about making herbal salts and sugars with your end of the season herbs. I baked sugar cookies and when the came out of the oven I sprinkled on the lavender and rose sugar's (I made earlier in the summer). The lavender seemed to give the most flavor, just of little hint of it. We also tried the sugars in ice tea. That was wonderful.
Another use for herbal sugar is as a bath/shower scrub. 


PJ demonstrated her chile pepper salt/pepper blend. She grows and dries many different types of peppers, you can make it as hot as you like, she kept it mild for the group. She ground them in a spice grinder with dried basil.


Mixed it with sea salt and black pepper. Everyone took home a sample.
I tried it this weekend on steak, perfect.


I picked a big basket of my herbs, cut them up into sea salt and shared them with the group.
They needed still to take them home, put into a blender and pluse until they become ground up.
Then spread on a cookie sheet and place in a 200 degree oven until completely dry, approx. 2 hours. Stir mixture several times during the process. Store in sterilized jars keeping away from moisture.
 

Friday, August 21, 2015

Japanese Textiles


Last week one of the premier quilt shows "American Quilters Society" was here and as always it is the best.
Top quality quilts on display, rows and rows of venders, and numerous classes and lectures. Something for everyone.
This year I took a Sashiko (Japanese hand sewing technique with large needle and thick thread) class from Pepper Cory. I've been wanting to learn the technique.
The stitching has a long history in Japan. In a nut shell, the poor people used this large stitch to layer fabric on their clothes to fix holes and rips. Also they layered clothing to make it warmer. It began as a utilitarian stitch but has since become a highly respected decorative stitch. The old clothing and quilts are known as Boro.
The following pictures were hand stitched by Pepper Cory.


Just like quilt patterns the sashiko stitches have different meanings.


This is a quilt top still in progress.


A completed "moon" wall hanging with sashiko stitching in the lattice strips.


A fun modern version using madras plaid.


This was the teachers class sample. Of course I loved the moons.


This is mine (not sewed together). All my fabrics were from Japan,
wonderful with lots of texture.
Mainly in class I practiced the sashiko stitch, which is very hard for traditional hand quilters. When I learned in the 80's you learned to make teeny, tiny stitches, which I love. It is very hard for me to make stitches the size of rice! I have half rice size stitches. Another very important part is to keep it even between the stitches. So this was just a practice piece, I'm sure the next ones will be much better. 


This is another piece of Japanese fabric I bought, didn't have a plan for it just loved it.


Then I saw one of Peppers sashiko stencils with a dragon. Someday this will become a lap quilt.


My class was an all day class with an hour break for lunch, during the lunch hour I went to a lecture by Carol Ziogas from Kimonomomo. She sells Japanese fabrics (where I bought all mine). She has a large collection of vintage Japanese textiles which she brought to show.
Many of these are from the late 1800's to early 1900's, all indigo dyed and hand woven. These are just a few.
The first one is a child's kimono.


A man's with "mon" (family crest) resist dyed.


The front.


A large blanket, you can see the cloth is not very wide.


Hand stitched together and on the back patched.


I love this blanket with the red patch.


This kimono with a squid design resist dyed.


This kimono with a wonderful shibori dyed technique.


A fireman's jacket from the middle 1900's.


They were made from cotton so to make them "fireproof" they were kept soaking in water until needed.


The following are some of her collection of Furoshiki (wrapping cloths).
These were used like our store plastic bags are now used. The island is now so full of old plastic bags a lot of the people have now gone back to using these.
This first one has sashiko stitching in the corner.


This one was dyed with persimmon dyes.


Furoshiki with the family crest,


another.


The real elegant one are called Fukusa, this is a formal gift covering cloth.
After you gave the gift wrapped in this cloth the recipient would give the cloth back.


Notice the ironed folds in the fabric, this was kept so the people would know this was important and not for everyday use. The same for special kimono, they would keep the ironing folds in. Including wedding kimono.


A special furoshiki for tea ceremony.


A wonderful thing Carol (the speaker) did was give everyone a card with fabric samples on it and a paper with Japanese textile words and explanations.
theardentthread.com
This is a link to her web page with more links to order fabric.

Wednesday, August 12, 2015

INDIGO MOON


The summer weather is beautiful here and the dye pots are calling.
With the full blue moon I was inspired. It was time to dye indigo moons for the Sun/Moon quilt. I brewed up a strong batch,
 the indigo "bloom" telling me it was ready.


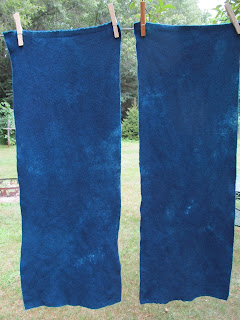
I worked very hard to get two wonderful moon blocks.
I especially love this one with moon beams shinning down from the moon and a slight cloud cover.
The block size is around 17"x20".
(After washing and ironing)


My next moon for the quilt isn't quite as good but will do. 17"x20"
I think the quilt needs 3 moons the last one will be a crescent moon appliqued on an indigo block.


A few smaller moon blocks, 7"x10"


Extra indigo fabric.


The quilt is coming along.


I also had a batch of cochineal/madder root solar dyeing.


It will be my next block, a spiral sun.


My garden behind the studio in full bloom.

Tuesday, August 4, 2015

Next natural dyed Sun block


My husband and I had a small trip coming up, but before I begin to pack clothes I get my quilting ready, this getting ready started with Eco dyeing the wool fabric with dyers chamomile flowers.
I wrapped them tight in the wool, steamed them a good hour and left them until the next day. I wanted more color on the cloth so I took the wool out of the pot and stuffed it in a large pickle jar (without unrolling it).


I stuffed the jar full of dried cosmos and coreopsis flowers and a little bit of cochineal bugs, poured boiling water over it.


I then set it in the sun to process for a week.


After unrolling it I was left with the yellow flower pattern surrounded by shades of orange.


I carefully cut out the center sun.The rays I cut following the string pattern left on the wool.


Basted it on indigo wool and off we went.


Not to talk about rest areas but this one on Interstate 80 in Iowa was beautiful.
Iowa had a wonderful quilt history and it is celebrated through out the State.
This is tile inside.


There are tile quilt blocks inlaid all around the outside of the building.


With needles and thread circling.


We stumbled across  beautiful art fair. This man is from Peru and spends the summers here with a host.
He is a master weaver and sells his weavings all summer to make money for his family back home.


Look at his hand-carved wooden gear on his loom. His weavings were beautiful.


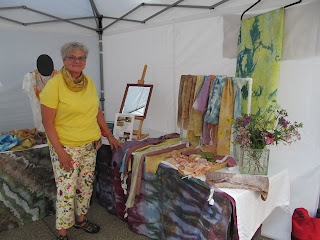
Another artist I met was Leslie. Leslie is a master gardener and dyes silk scarves using natural dyes.


She dyes once a week from her garden.
(Hi Leslie, wish I could have joined you!)


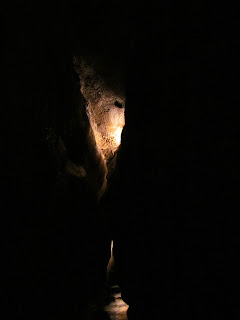
We did a little caving. Walking through not crawling.


This is a limestone cave.


Way deep in the cave was this beautiful turquoise pool of water.


We also spent a couple days with our good friends who live on the Mississippi.
The weather was beautiful, I only wanted to sit on the dock and watch the river go by.
A great photo op for my now finished first Sun.


And my almost finished second Sun with third one solar dyeing as we speak.


As the Sun set on the river it was time to get ready to leave, it's back to the real world.
Thank you Jack and Donna, see you on the flip-flop!!

  • Deb Hardman
  • Allie Aller
  • Jenny Bowker Cairo
  •